
 |
| Helleborus orientalis First flowers in our garden! |
I get as excited about spring flowers as the next enlightened, sensitive guy, but the thing that really tells me the season has started is when we get our first flagstone installation for the season.
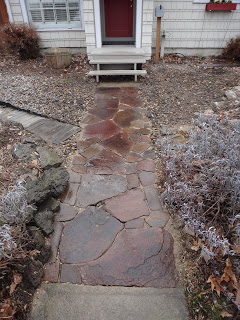
This flagstone walkway I built for a bungalow in the North End took me the better part of of last Monday to complete. There is truth in the term "hardscape".
 The coolest thing about the walkway, other than the fact that our
client paid us instantly (thanks Beth!), is that all the stone comes from an easy drive's distance from Boise.
The downside of using this local stone is that while one side of the stone is generally pretty flat, the other side isn't. The stone also doesn't have a uniform thickness like Arizona sandstone, or some of the other rock quarried in Idaho. This makes installation of our local stone a little tricky.
 |
| Dreaming of flat bottomed pavers |
- excavate the site
- install a course base and compact
- install a compacted & screed sand base
...and then you're ready to lay down your flagstone. If you've done a good job with your prep work, this last step can be completed pretty quickly.
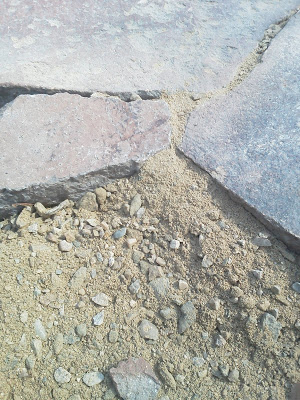
Our local stone requires a couple more steps.
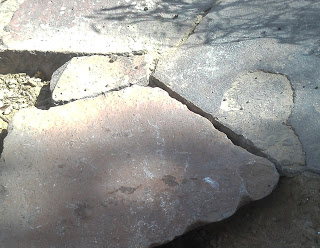
I use thicker pieces as a "keystone" within the patio to lock in thinner pieces of flagstone.
This requires you to excavate a bit of the sand you've worked so hard to compact.

I lock in the rocks by using a rock hammer to compact sand around and under the stones.
And then add another rock...
And then another 80 or so pieces until either I'm done or I can no longer hold on to my rock hammer.
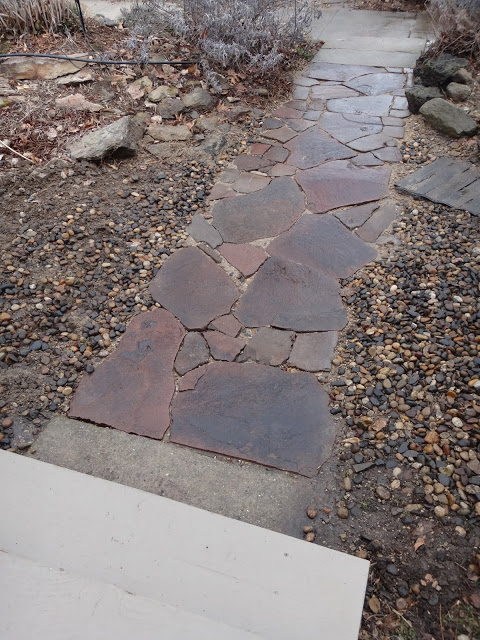
I finish up each flagstone project by sweeping sand over the top of the rocks, filling in any voids to prevent stones from rocking.
Happy hammering.